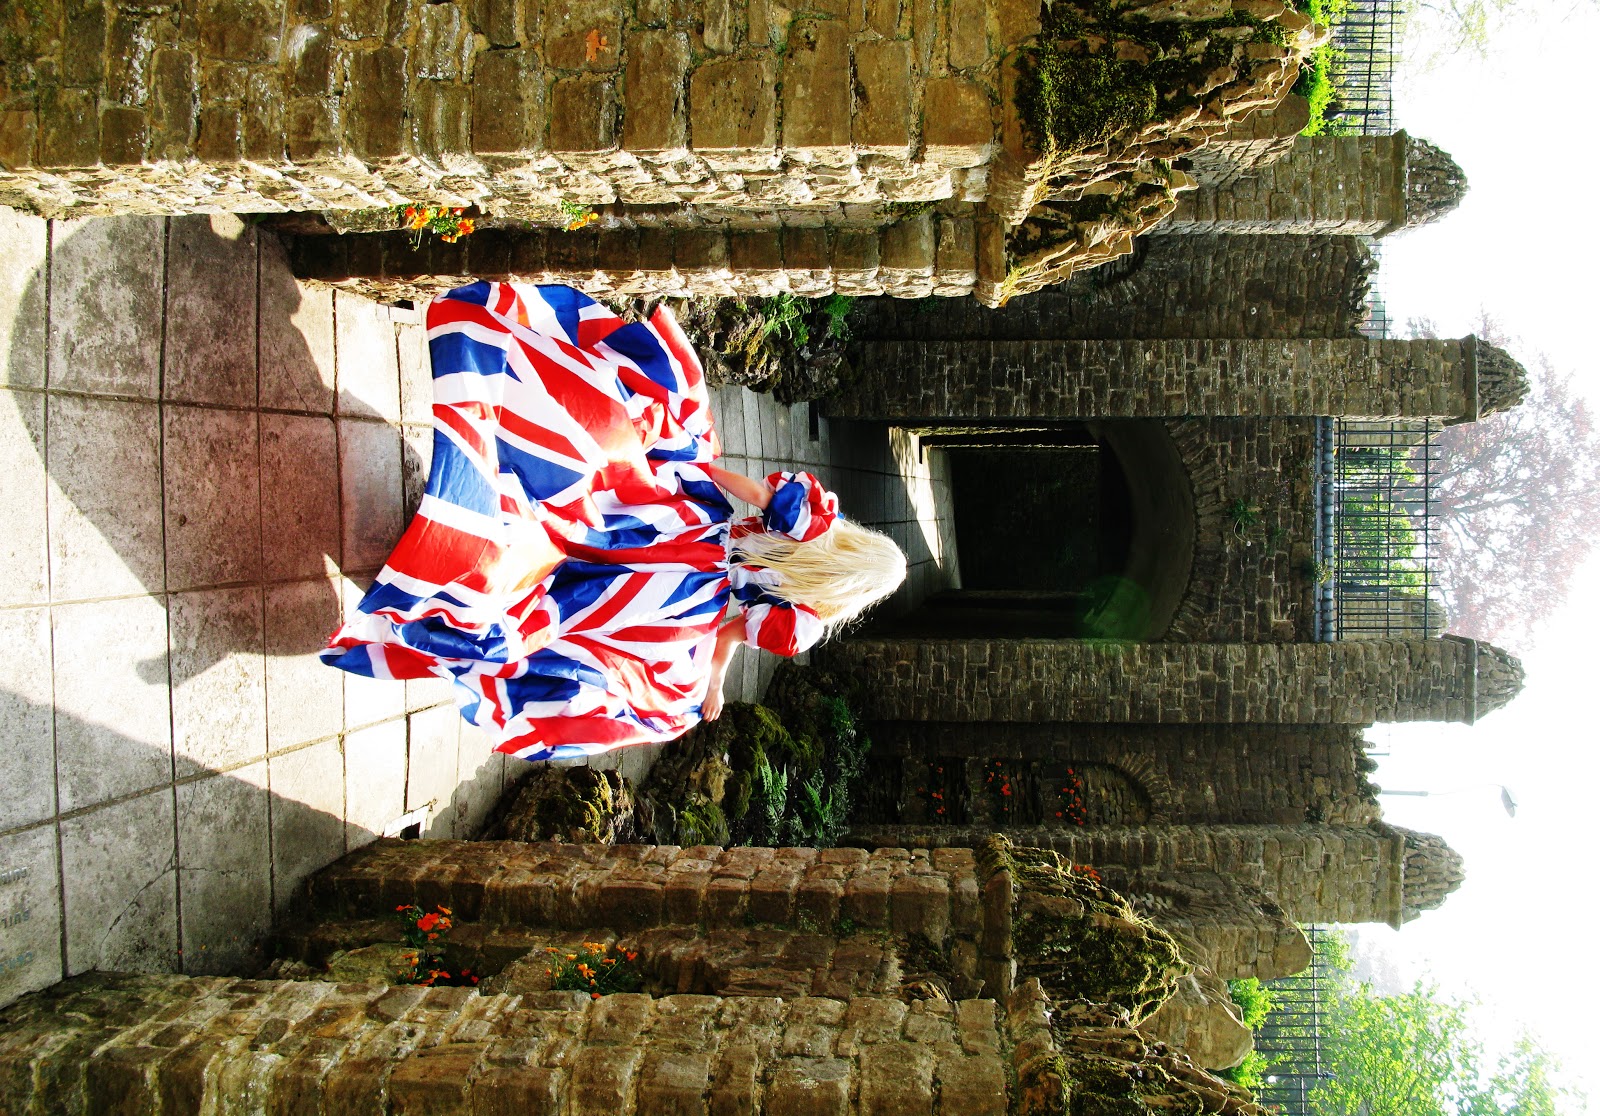
As I was not impressed with the edited pictures form yesterday I continued to edit in a variety of ways. The most effective out of the pictures above is the first, with a solarized effect. It gives the photo a dramatic background and intense colour. I also like the effect of having the background in black and white and the model in colour, similar to the last shoot. In this shoot it works differently because it makes the colour in the costume look vibrant, but I am cautious as to whether keep them the same or make each shoot a completely different effect.
Monday, 25 April 2011
Friday, 22 April 2011
Day 110: Shoot 2 editing
I found the technique of editing my first set of photos really effective and time efficient. I have repeated that same technique of choosing my favourite compositions and editing in different styles.
![]() |
| saturated and contrast |
![]() |
| desaturated and bold/contrast |
![]() |
| stenciled |
![]() |
| curves and desaturated |
![]() |
| bold/contrast and crop |
![]() |
| colour balance- brown |
![]() |
| faded using history brush |
![]() |
| reduced saturation |
![]() |
| burnt edges and contrast |
![]() |
| original- like composition |
![]() |
| slightly desaturated |
![]() |
| original- shows tower |
After my first edit I am not convinced as to how to edit the set of photos, as not one has stood out to me. The most effective one so far is saturating the colours and adding contrast as it compliments the dress.
Thursday, 21 April 2011
Day 109: Shoot 2
| doing make up |
| shot on location |
Not being able shoot at my top two locations was a disappointment but looking at the pictures from today the third location of choice, Guildford Castle, has worked well. I was not able to get the wide location shot with a big castle in the background, but had to settle with a portrait photo with a tower. After shooting at Guildford Castle we moved to the second location which was just down the road. An origianl idea I had was using the gates at Hampton Court but as shown in the last post, it was not how I expected and therefore found another set of large gates just down the road from Guildford Castle. My initial thoughts are to make the colours really bold and pop out of the dress when editing.
Wednesday, 20 April 2011
Day 108: Shoot 2 locations
I had originally hoped to shoot outside of Windsor Castle but I later found out, I needed a commercial license. The next location I was going to use was Hampton Court Palace, but I also needed a commercial license.
The videos below show me exploring outside Hampton Court trying to find a location which I could shoot which still showed the Palace. I had high hopes for a public footpath which went alongside the Palace with huge golden gates on which I later found out had another gate surrounding it.
Last minute I had to go to Hampton Court (with the shoot being tomorrow) as the model notified me today her only available day is tomorrow, therefore I wanted to scout out the location before the shoot.
In the end I decided the location would not work and have had to go with my third option of Guildford Castle.
| from across the river |
| gates infront of gates |
| Last minute experimentation with make up for flag shoot |
Tuesday, 19 April 2011
Day 107: Costume 3 cont.
After the skirt being so successful yesterday I was predicting something to go wrong today! Nothing went majorly wrong but I had lots of problems to solve. As the skirt was very simple in keeping the flag straight and conventional, I wanted to explore the flags patterns within the corset. I cut out the patterns on paper which I then transferred to the flags but on a slant.
The major problem I encountered was when I had all the pieces cut and pinned but did not know how to attach them together. Sewing would take a long time and I have not had much experience so would not get the outcome I wanted. I experimented with pinning and tacking but the shape of the corset would change too much. In the end I used double sided tape for each section as it held the shape but obviously as it was tape I was not sure as to how long it would hold. I decided the tape would be ok because I have to remind myself that the costume is for a fashion shoot and is needed to look effectively but doesn't have to be made perfectly.
| the flag corset pinned |
| paneling the flags |
| Sleeves pinned |
| unfinished sleeves |
The sleeves were very simple compared to other parts of the dress. I used the flag scraps to tack (sew) onto the inner sleeve then folded the material back on itself. This meant I could make the ruffles and change the size and shape aswell. I was surprised as to how heavy the sleeves turned out to be with the extra fabric so may have to stitch parts on the day of the shoot if the sleeves do not hold.
Monday, 18 April 2011
Day 106: Costume 3
I have taken pictures throughout all stages, this is the making of the skirt.
| original dress which I have used for my structure |
| sewing all the flags together |
| threading flags onto elastic |
| adding extra volume using bubble wrap at the hips |
| final skirt |
| final skirt |
At the end of today I am very pleased with the outcome, the structure of the dress has really helped as it has become my canvas to work on top of. I was worried as to how I would keep the length of the flags as I already know i want to create movement and flow into the photos using the skirt. I had no problem sourcing the flags as the royal wedding is coming up, which has also been one of my inspirations.
Friday, 15 April 2011
Day 105: Shoot 1 Finals
Using the chosen editing technique and best three compositional photos I have produced my final three photos of costume 1.
The main issue I encountered was the shades of the models skin, her face and chest was tanned whereas her legs and arms were very pale. I overcame this by adjusting the colour balance and adding more red and yellow in her arms and legs.
I am very pleased with the final outcome as everything works well together. The costume, hair and make up are all very striking then there is a detailed and unusual background full of texture.
Wednesday, 13 April 2011
Day 104: Shoot 1 editing
Initial editing
The first step in my editing process is to select the top compositions I want to use, roughly 12. I then edit each on differently using a wide range of effects, crops and tools. I try to make each one completely different from the last as then i will have a huge range to chose from. The only problem i encountered with this is...i forgot how i edited them!
Some are pretty basic editing but for my final effects i had chosen the one technique which i couldnt remember how to do. After manipulating an original photo for awhile I finally found how i created this unusal technique, by desaturating the photo, then going crazy with curves which gave the metal in the photo a space like look. I have chosen this effect to use on my favourite three compositions. I chose three as in a fashion spread this is the average amount I would be fascinated by before losing interest.
I have found editing your own pictures is one of the hardest things as would have to be very selective
![]() |
| classic b&w with extra contrast |
![]() |
| love the composition, b&w with extra contrast |
![]() |
| like the effect but takes away from costume |
![]() |
| barbie inspired pose and colours |
![]() |
| barbie inspired pose, b&w, compliments the costume |
![]() |
| ejector seat adds detail and context, highlights shape in leg and arm |
![]() |
| flash makes it look superficial, saturated colours |
![]() |
| very successful edit, curves gone crazy and b&w |
![]() |
| extrude around model, very effective but takes away from costume |
Tuesday, 12 April 2011
Day 103: Shoot 1
I have taken pictures throughout the day and photoshoot as a storyboard for the making process.
![]() |
| designing and doing the make up myself |
![]() |
| cling film around the body and taping the bodice to the model |
![]() |
| finished bodice |
![]() |
| problems encountered with the back of bodice |
![]() |
| problems fitting the leg shield on |
| taking role of stylist and choosing accessories |
![]() |
| taking role of hair stylist, without or with wig? |
![]() |
| Final outfit with wig and taped boots |
Todays shoot went really well and encountered no major problems, whilst I have been able to handle playing all the roles in the days before the shoot such as designer and stylist, I found it very demanding and time consuming to play all roles on the day, make up artist, designer, stylist, hair and photographer. On the other hand it has helped me as for future reference I have to allow alot of time for the shoot as instead of a team working for afew hours it is me and the model for the day. I cannot wait to start editing the pictures now, I already have an idea of how I want the final outcome.
Subscribe to:
Posts (Atom)


