Saturday 30 April 2011

Day 115: Shoot 3 editing

As I had already decided to stay with the theme of making the model and costume pronounced in colour and desaturating the background it made it alot easier to edit the photos using Photoshop. 
On the other hand as the editing was made easier it seemed as if selecting the compositions was alot harder. I wanted to show the beauty of the location against the costume so found myself selecting lots of similarly framed shots instead of a variety of positions and locations around the hotel. 
I have also tried to keep to portrait photos as by coincidence the final images from the past shoots have been portrait and I want to keep them as a set of photographs.
I have noticed that the images from head on or at a high angle compliment the costume and its shape whereas from a low angle the shape loses its impact.
beams on angle
effective framing and effects
unusual crop, over exposed
half length adds variety
weak pose but shows location effectively
highly saturated photo
highly saturated
darkened, curves and contrast
effective use of lighting
tilted crop
effective use of lighting, saturation
background slightly desaturated

Friday 29 April 2011

Day 114: Shoot 3


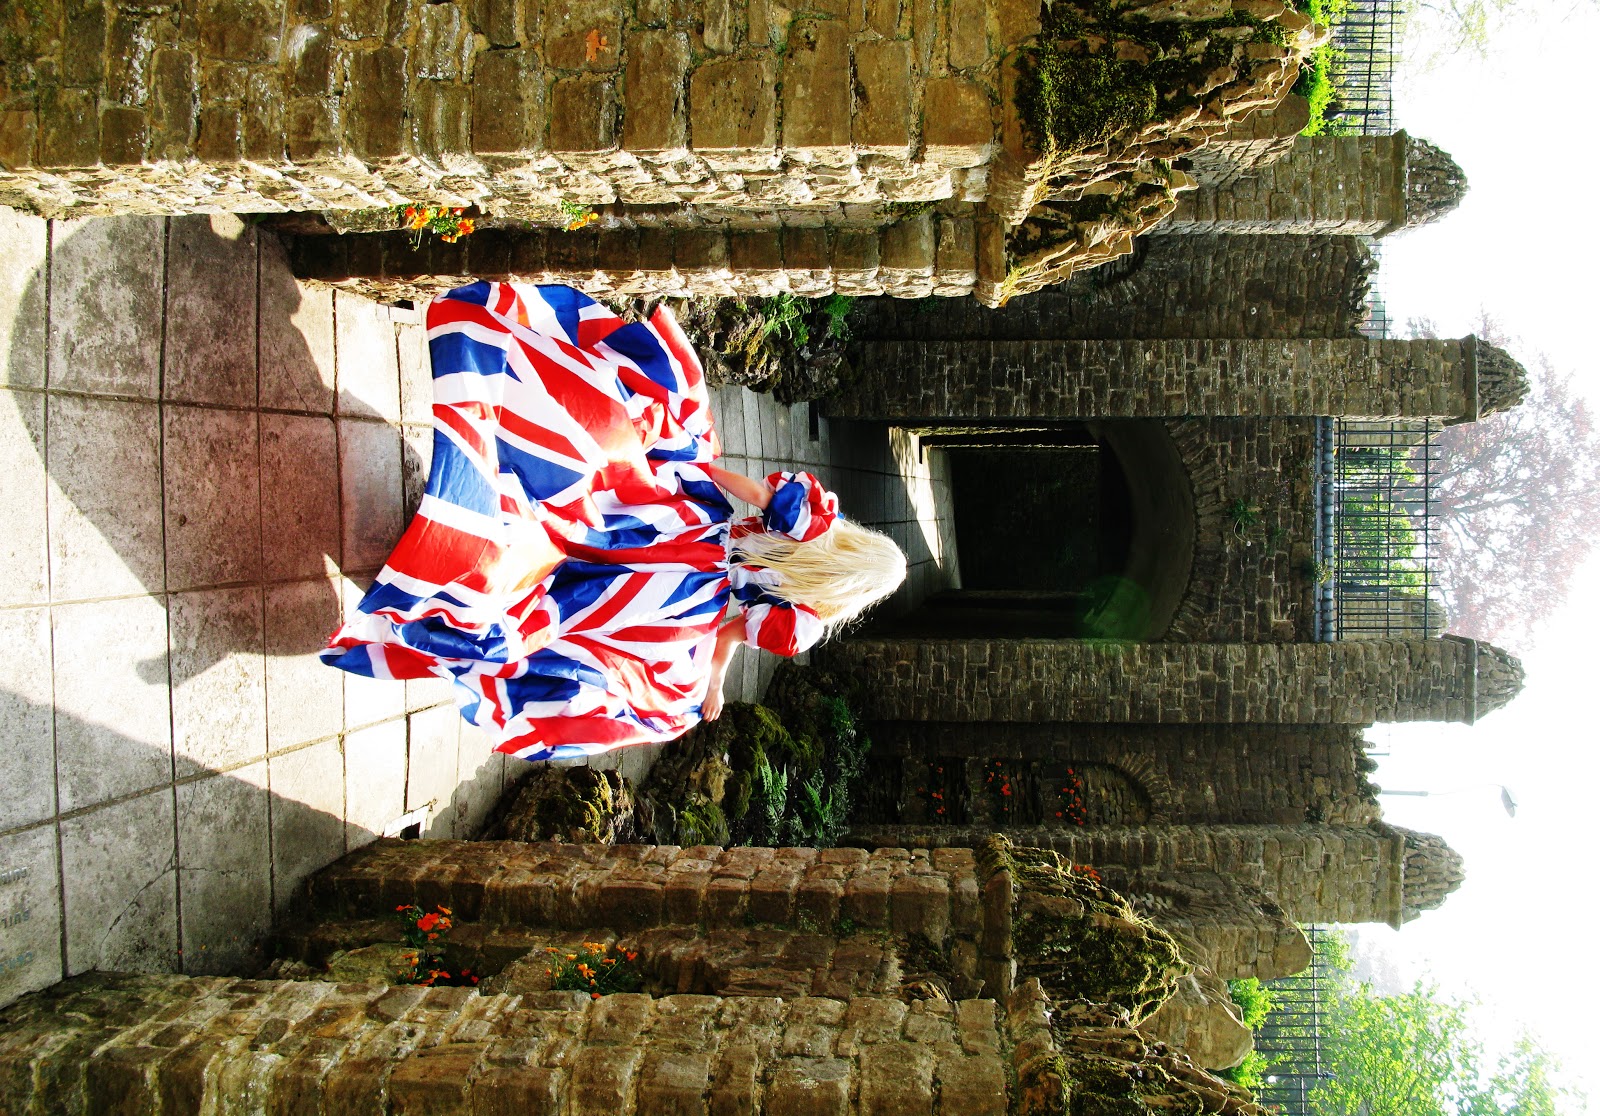
The shoot today was very successful as I believe I achieved the exact look I wanted from the costume, model and location. I had planned the schedule effectively aswell as the early morning meant that making the costume on my model was ready by 12 and after make up we did the journey to the location. 
The journey was one of the trickiest things as the costume was not fixed or sewn in a way that it would hold for a long time so we had to be careful not to ruin the outfit. 
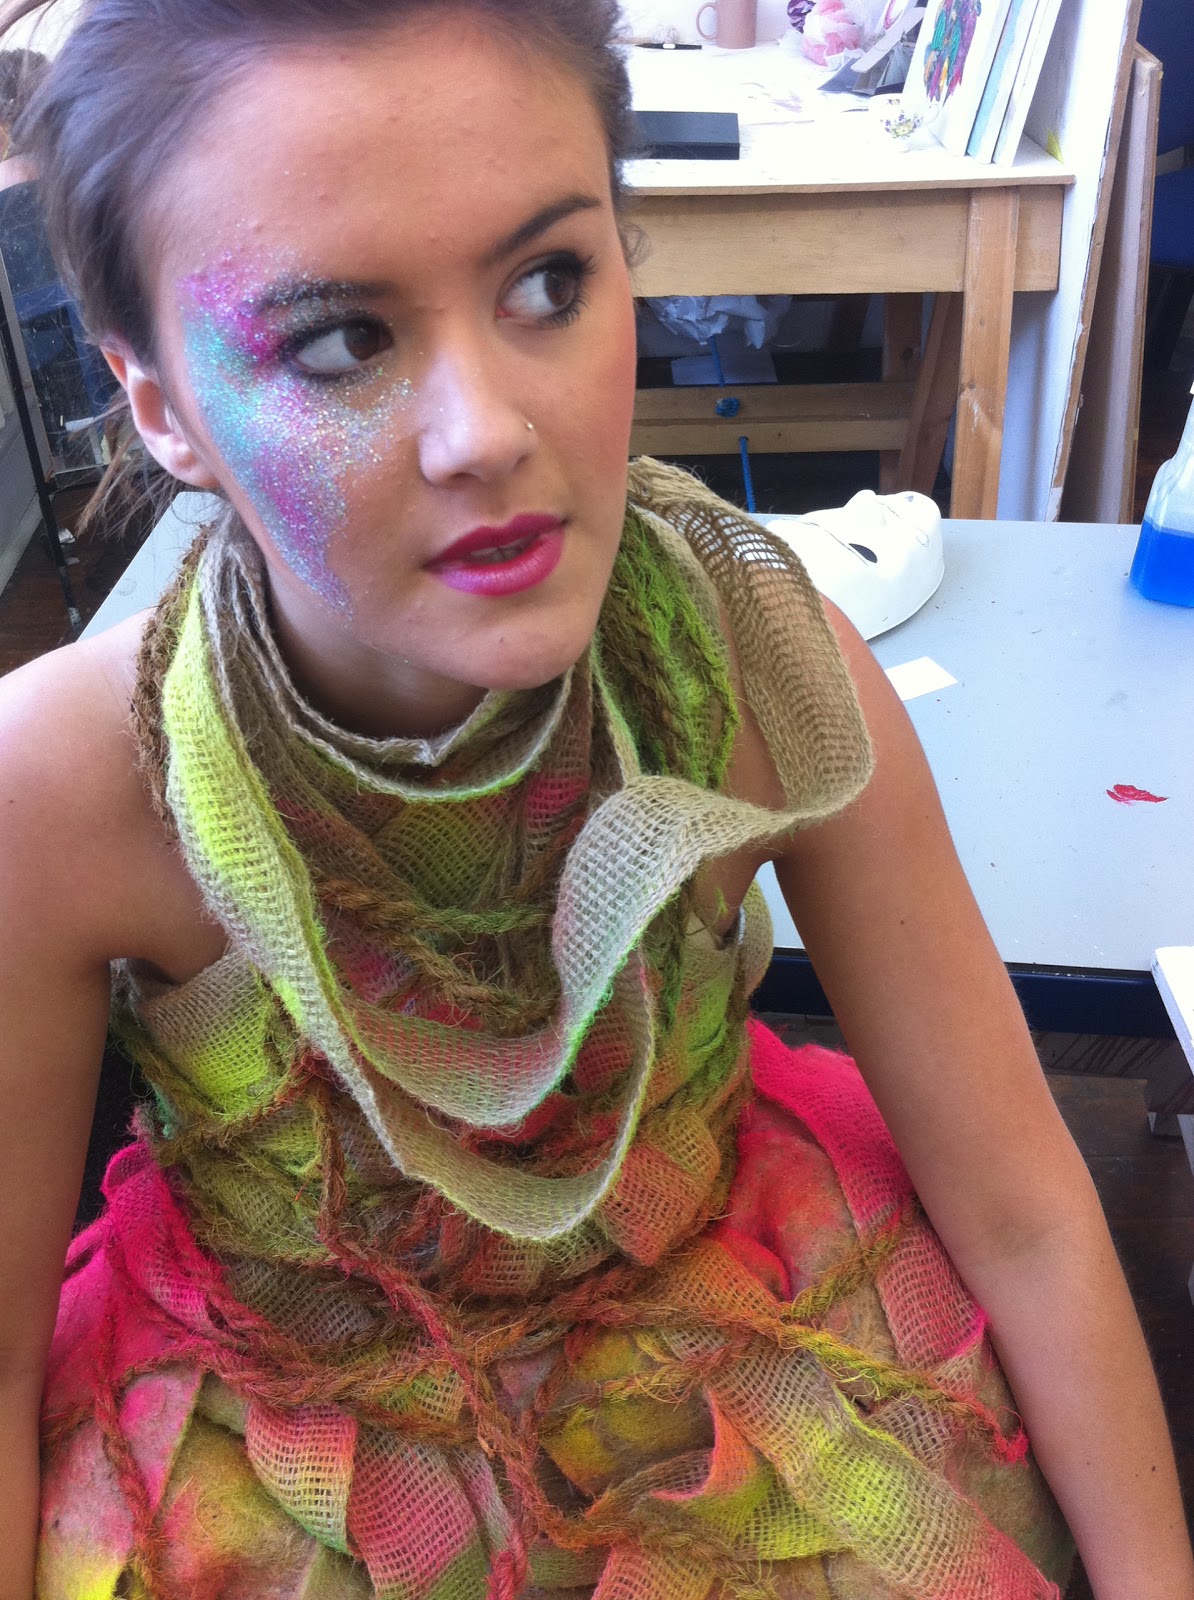
I decided on using the colour pink, green and yellow for their vibrancy and neon effect which would make them stand out in pictures. I decided not to use any of the little embellishments I experimented with as I had a lightbulb moment and thought I would use them within the fringe of the wig.
I had a desire to use something as a hat for one of my shoots and have been brainstorming throughout the project, I finally decided on a Barbie car. This was going to be perfect for this shoot as I could personalise the car with colour to match the dress. These Bauhaus Barbie shoots are all about reinventing fashion using unusual materials and creating a striking image representing this.

Thursday 28 April 2011

Day 113: Costume 4

Taking inspiration from the location I have already selected, a run down hotel, I have sourced material to make the costume form. The material I selected represents the run down quality of the hotel and I plan on using spray paint to represent the vandalism of the graffiti. The photos below show my process of experimentation of materials.
canvas material


adding shape
I used the hanging baskets from costume 2 (which I am no longer using for a shoot) to add shape at the hips. One of Oskar Schlemmer's main focus was shape and I have included this in my pasts shoots and wanted to keep this as a continuous theme. The shape gave it structure and I believed it transformed the costume into something new and exciting.
I am unsure as to my colour palette for the spray paint on top as I would like to feature the Barbie Pink in at least one of my shoots so plan on incorporating it. It would work well as this shoot is all about transformation and how the graffiti has transformed the abandoned hotel, similarly the paint and colour transforms the costume with vibrancy and impact.

Monday 25 April 2011

Day 111: Shoot 2 editing cont.


As I was not impressed with the edited pictures form yesterday I continued to edit in a variety of ways. The most effective out of the pictures above is the first, with a solarized effect. It gives the photo a dramatic background and intense colour. I also like the effect of having the background in black and white and the model in colour, similar to the last shoot. In this shoot it works differently because it makes the colour in the costume look vibrant, but I am cautious as to whether keep them the same or make each shoot a completely different effect.

Friday 22 April 2011

Day 110: Shoot 2 editing

I found the technique of editing my first set of photos really effective and time efficient. I have repeated that same technique of choosing my favourite compositions and editing in different styles.
saturated and contrast
desaturated and bold/contrast
stenciled
curves and desaturated
bold/contrast and crop
colour balance- brown
faded using history brush
reduced saturation
burnt edges and contrast
original- like composition
slightly desaturated
original- shows tower
After my first edit I am not convinced as to how to edit the set of photos, as not one has stood out to me. The most effective one so far is saturating the colours and adding contrast as it compliments the dress.

Thursday 21 April 2011

Day 109: Shoot 2

doing make up
shot on location

Not being able shoot at my top two locations was a disappointment but looking at the pictures from today the third location of choice, Guildford Castle, has worked well. I was not able to get the wide location shot with a big castle in the background, but had to settle with a portrait photo with a tower. After shooting at Guildford Castle we moved to the second location which was just down the road. An origianl idea I had was using the gates at Hampton Court but as shown in the last post, it was not how I expected and therefore found another set of large gates just down the road from Guildford Castle. My initial thoughts are to make the colours really bold and pop out of the dress when editing.

Wednesday 20 April 2011

Day 108: Shoot 2 locations

I had originally hoped to shoot outside of Windsor Castle but I later found out, I needed a commercial license. The next location I was going to use was Hampton Court Palace, but I also needed a commercial license. 
The videos below show me exploring outside Hampton Court trying to find a location which I could shoot which still showed the Palace. I had high hopes for a public footpath which went alongside the Palace with huge golden gates on which I later found out had another gate surrounding it. 
Last minute I had to go to Hampton Court (with the shoot being tomorrow) as the model notified me today her only available day is tomorrow, therefore I wanted to scout out the location before the shoot.
In the end I decided the location would not work and have had to go with my third option of Guildford Castle.

from across the river

gates infront of gates


Last minute experimentation with make up for flag shoot

Tuesday 19 April 2011

Day 107: Costume 3 cont.

After the skirt being so successful yesterday I was predicting something to go wrong today! Nothing went majorly wrong but I had lots of problems to solve. As the skirt was very simple in keeping the flag straight and conventional, I wanted to explore the flags patterns within the corset. I cut out the patterns on paper which I then transferred to the flags but on a slant. 
The major problem I encountered was when I had all the pieces cut and pinned but did not know how to attach them together. Sewing would take a long time and I have not had much experience so would not get the outcome I wanted. I experimented with pinning and tacking but the shape of the corset would change too much. In the end I used double sided tape for each section as it held the shape but obviously as it was tape I was not sure as to how long it would hold. I decided the tape would be ok because I have to remind myself that the costume is for a fashion shoot and is needed to look effectively but doesn't have to be made perfectly.
the flag corset pinned
paneling the flags
Sleeves pinned
unfinished sleeves
The sleeves were very simple compared to other parts of the dress. I used the flag scraps to tack (sew) onto the inner sleeve then folded the material back on itself. This meant I could make the ruffles and change the size and shape aswell. I was surprised as to how heavy the sleeves turned out to be with the extra fabric so may have to stitch parts on the day of the shoot if the sleeves do not hold.

Monday 18 April 2011

Day 106: Costume 3

I have taken pictures throughout all stages, this is the making of  the skirt.
original dress which I have used for my structure
sewing all the flags together
threading flags onto elastic
adding extra volume using bubble wrap at the hips
final skirt
final skirt
At the end of today I am very pleased with the outcome, the structure of the dress has really helped as it has become my canvas to work on top of. I was worried as to how I would keep the length of the flags as I already know i want to create movement and flow into the photos using the skirt. I had no problem sourcing the flags as the royal wedding is coming up, which has also been one of my inspirations.